10 Photoshop Tips and Tricks for Beginners
We all know the photo editing software has made our lives. It's a secret weapon for Graphic Designers. nowadays anyone with a computer can master this software. From removing a blemish to adding some awesome design elements, anyone can learn the basics of Photoshop. Here are some simple tips and trick for Photoshop Beginner.
Note: All shortcuts in this article are for PC users. Mac people, you guys know what to do.
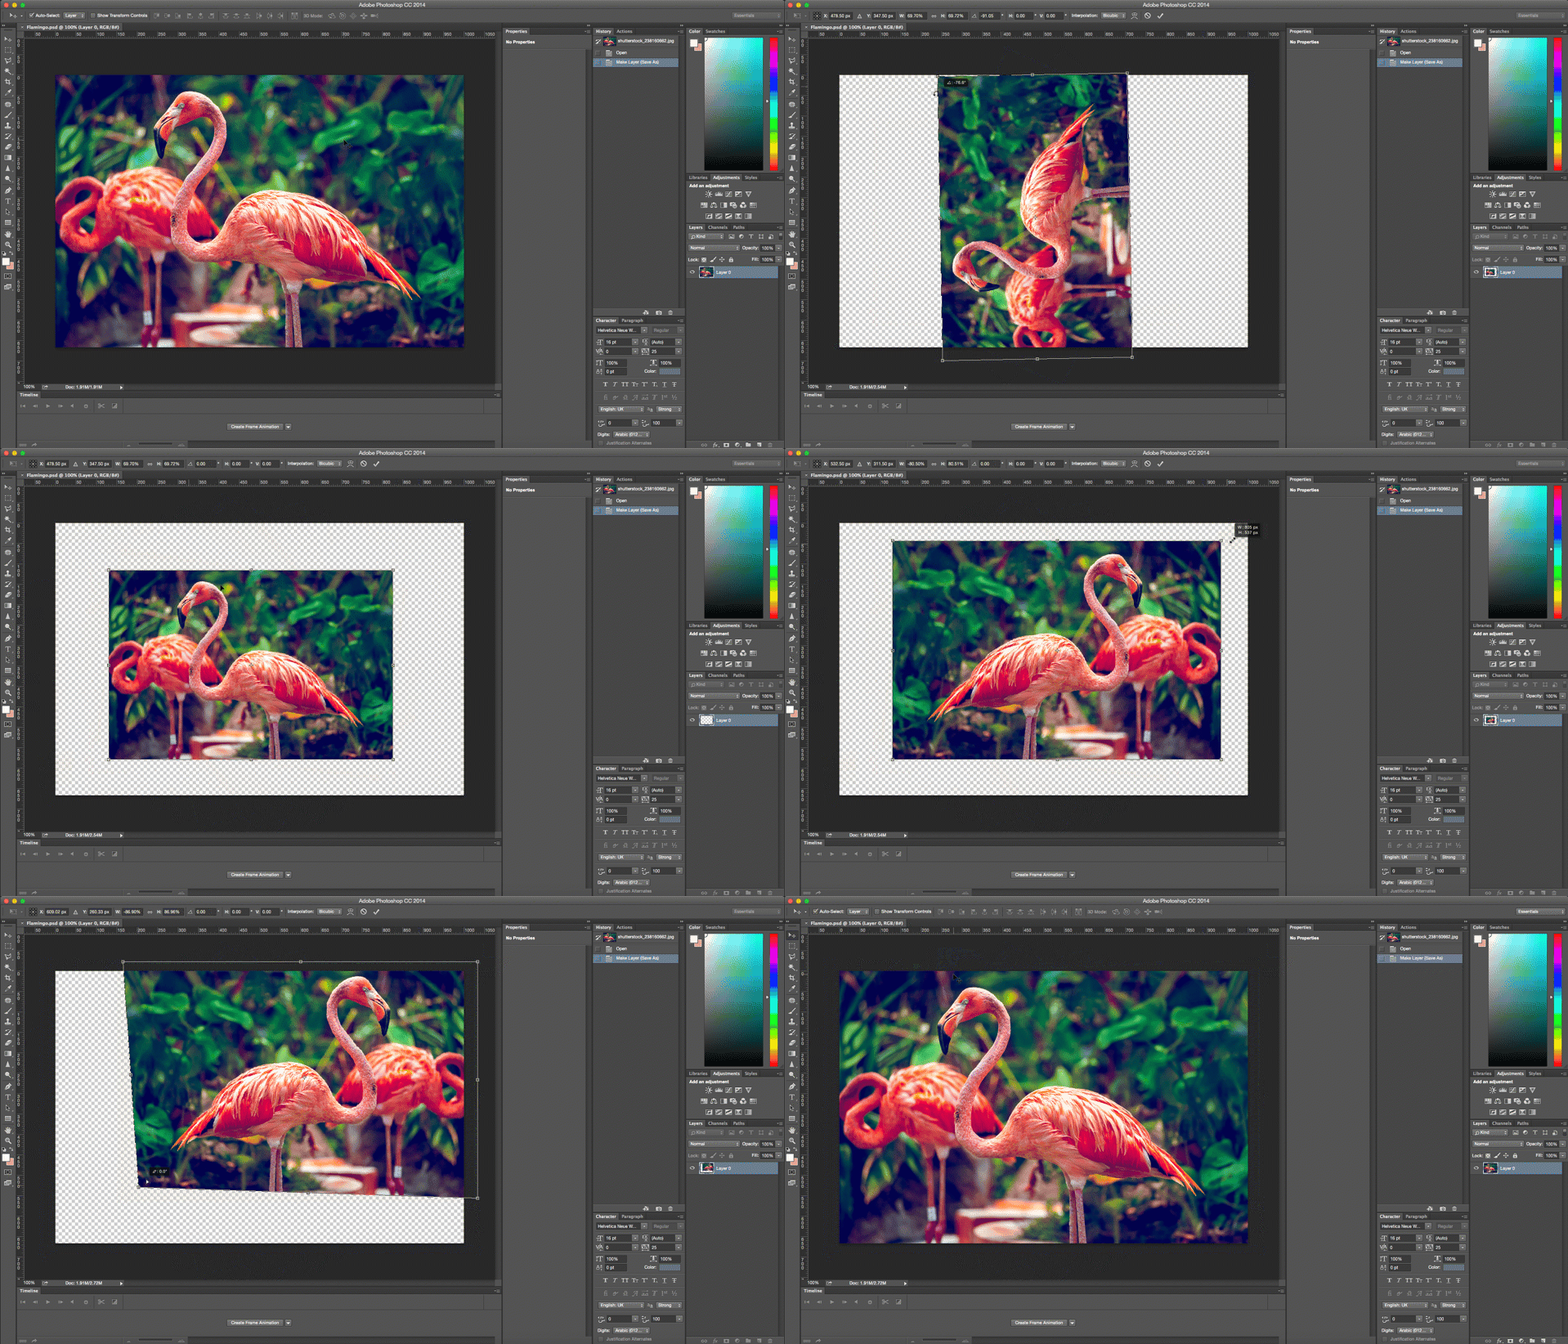
1. Transform: Changes Size, Rotation, Flip or Distort it
Click Edit > Transform > and select the action you want.
or you can try these shortcut to make it easier:
Press Ctrl + T on your keyboard and a hanger will appear around the image or text. Now you can resize or rotate your image like you want. The best way to do so is by holding the square corners of the hanger and then dragging the corner while holding the Shift key. And When you are done just press Enter.
And if you want to flip the image vertically or horizontally press Ctrl + T and then right click. A popup window will appear with few options, select the action you want to and press Enter to finish.
To Distort or skew press Ctrl + T and the place your cursor on whichever corner you want to skew. Press Ctrl while holding and dragging the corner to morph.
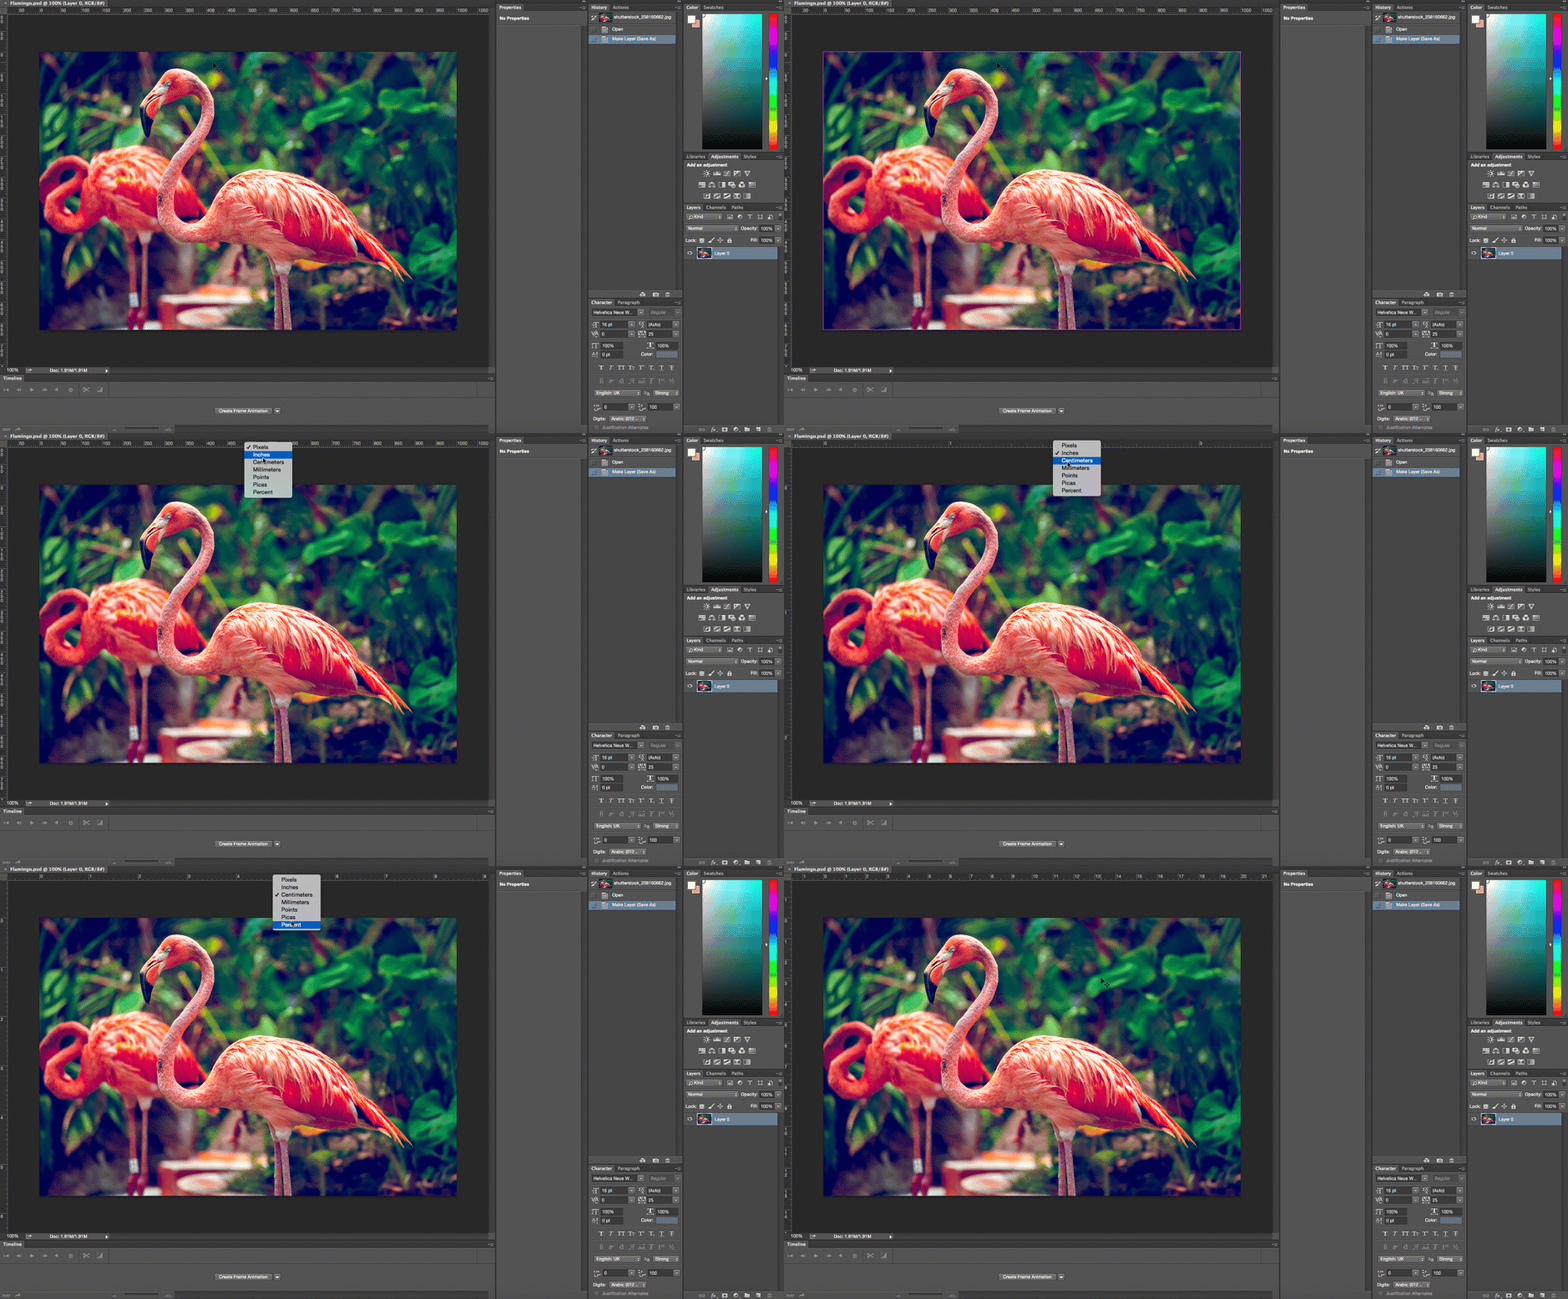
2. Unit of Measurement
A quick way to switch between the unit of measurements. Place your cursor on the rulers on your grid and right click, then choose a new unit for the menu. You will find a wide variety of units, from centimeters to pixels, millimeters, points and even percents. And you can show or hide the ruler by pressing Ctrl + R.
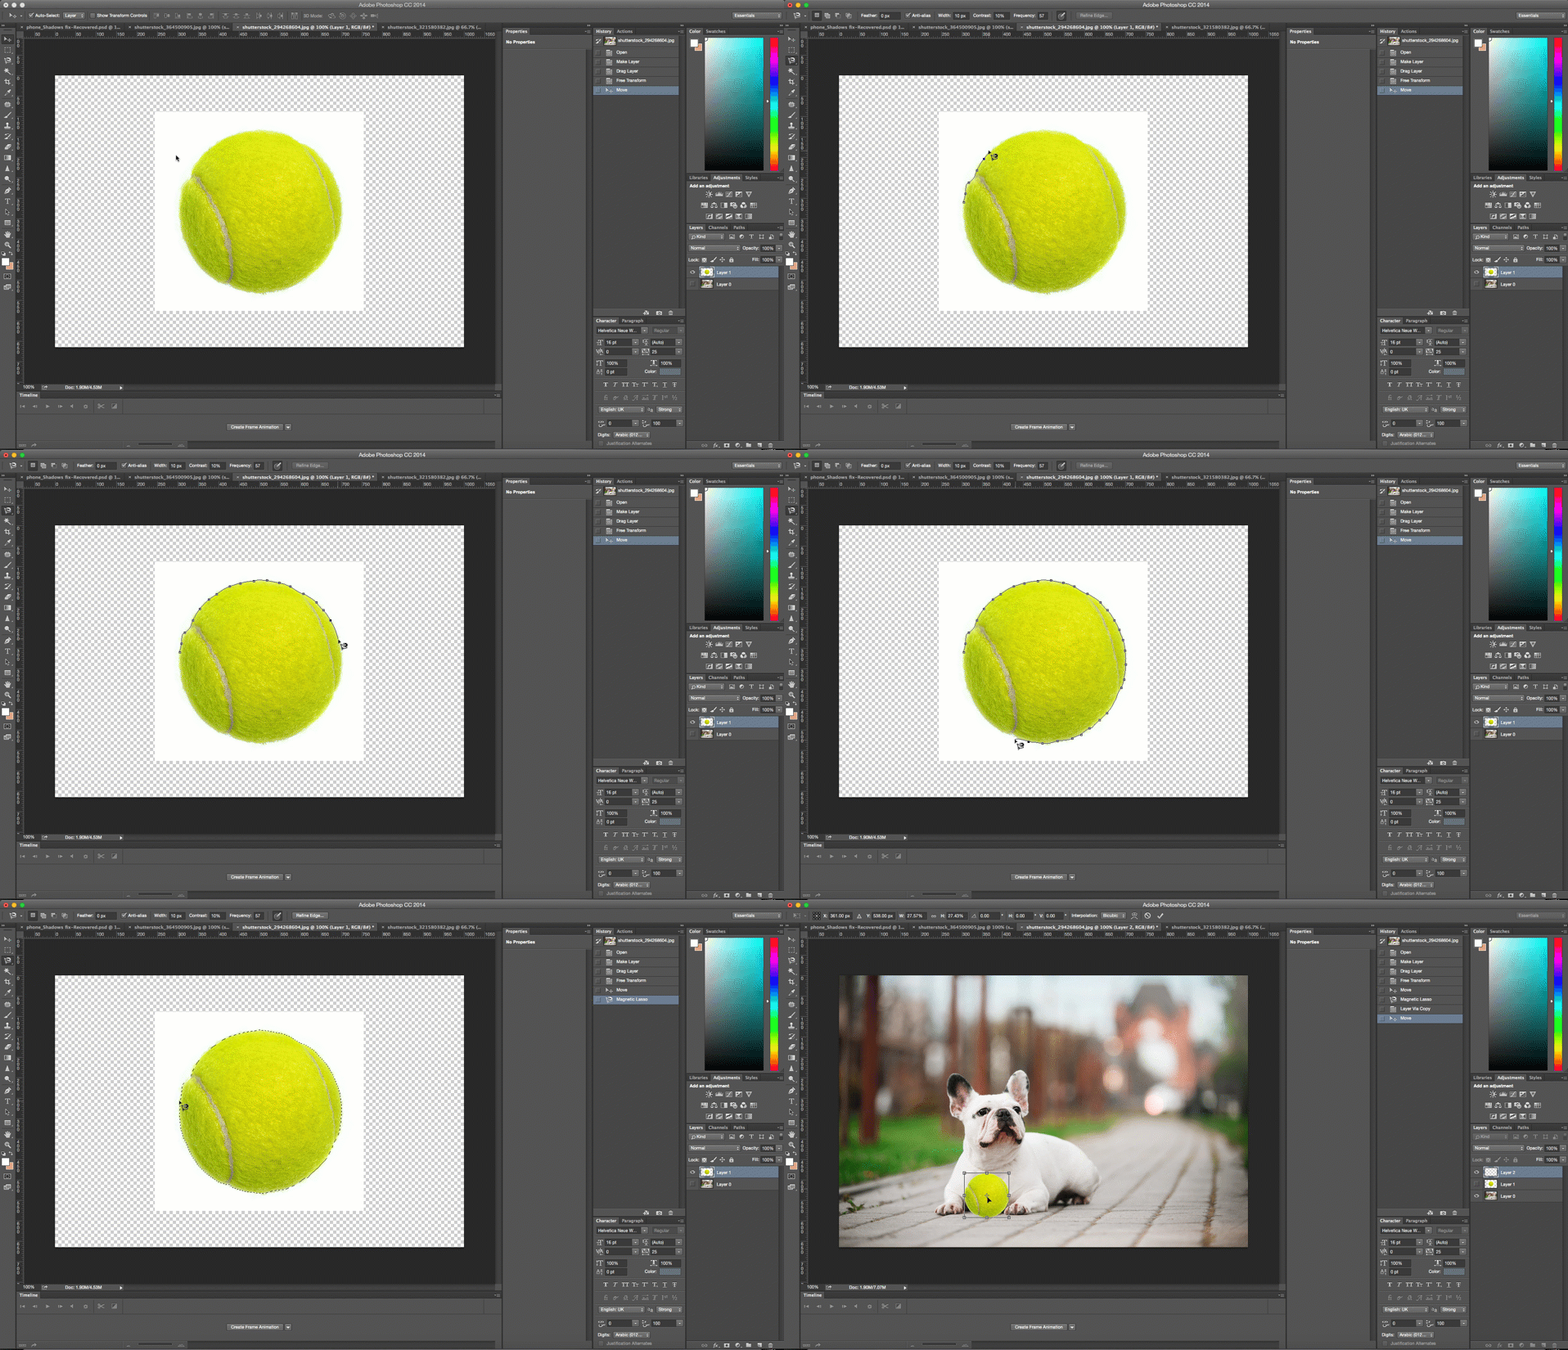
3. Magnetic Lasso
Lasso tool is man's best friend and gift to photo editing software. You can find this tool in your tool panel.
This selection tool will help you to trace the outline and cut, editing the exact part of an image.
To access the Magnetic Lasso, click and hold on the lasso tool until a drop menu appears. Magnetic Lasso is the Last one with a small magnet on it.
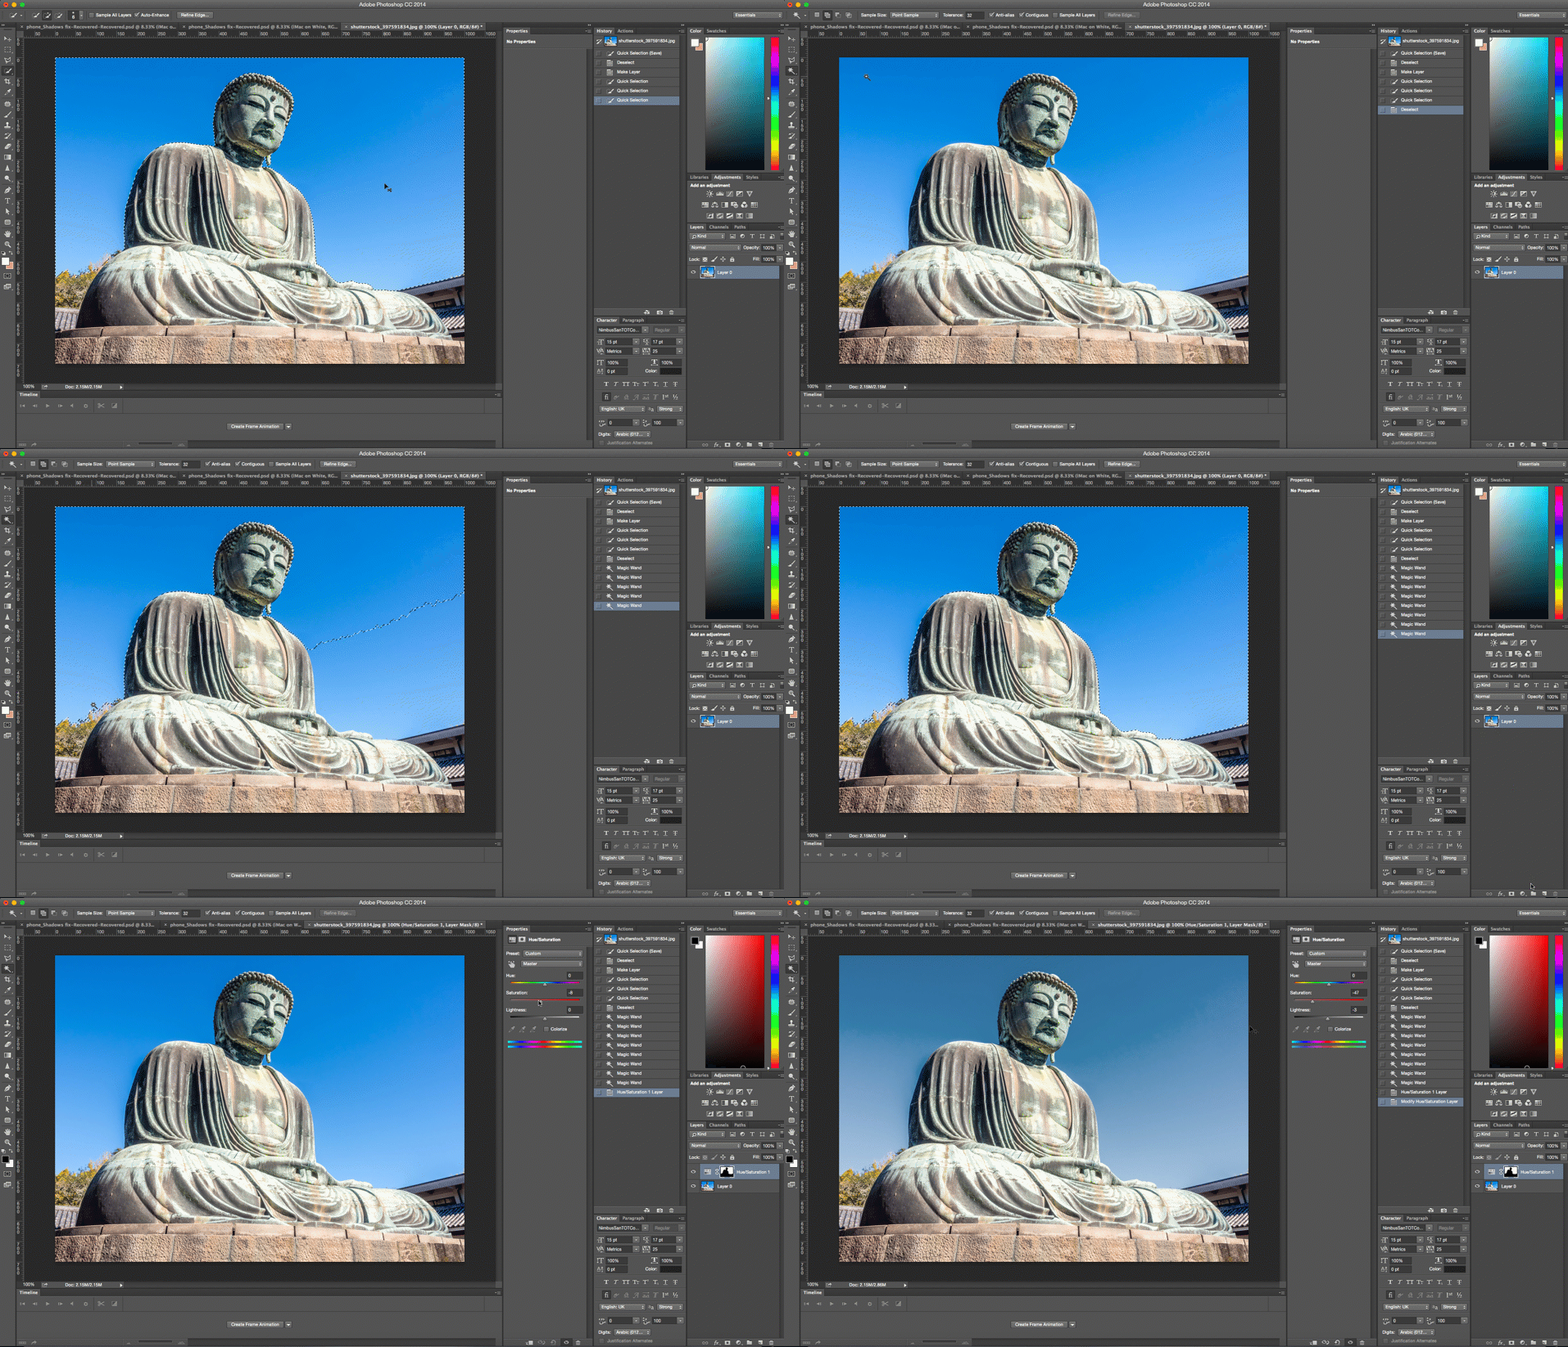
4. Magic Wand Tool
Magic Wand is another selection tool which works like magic. Just select the tool and click the area you want to select, but it only works on a consistent and monotone background like a solid color or clear blue sky. You can choose the Magic wand from the tool panel.
5. Custom Shape Tool
In the tool panel, we have all the basic shapes like circle, line, square, ellipse, etc. The Custom Shape tool is easy to find in the Options Bar, it looks a puzzle piece. You can access even more shapes by clicking on the small arrow right next to it. If you are looking for speech bubbles, arrows, banners this is just the tool for you.
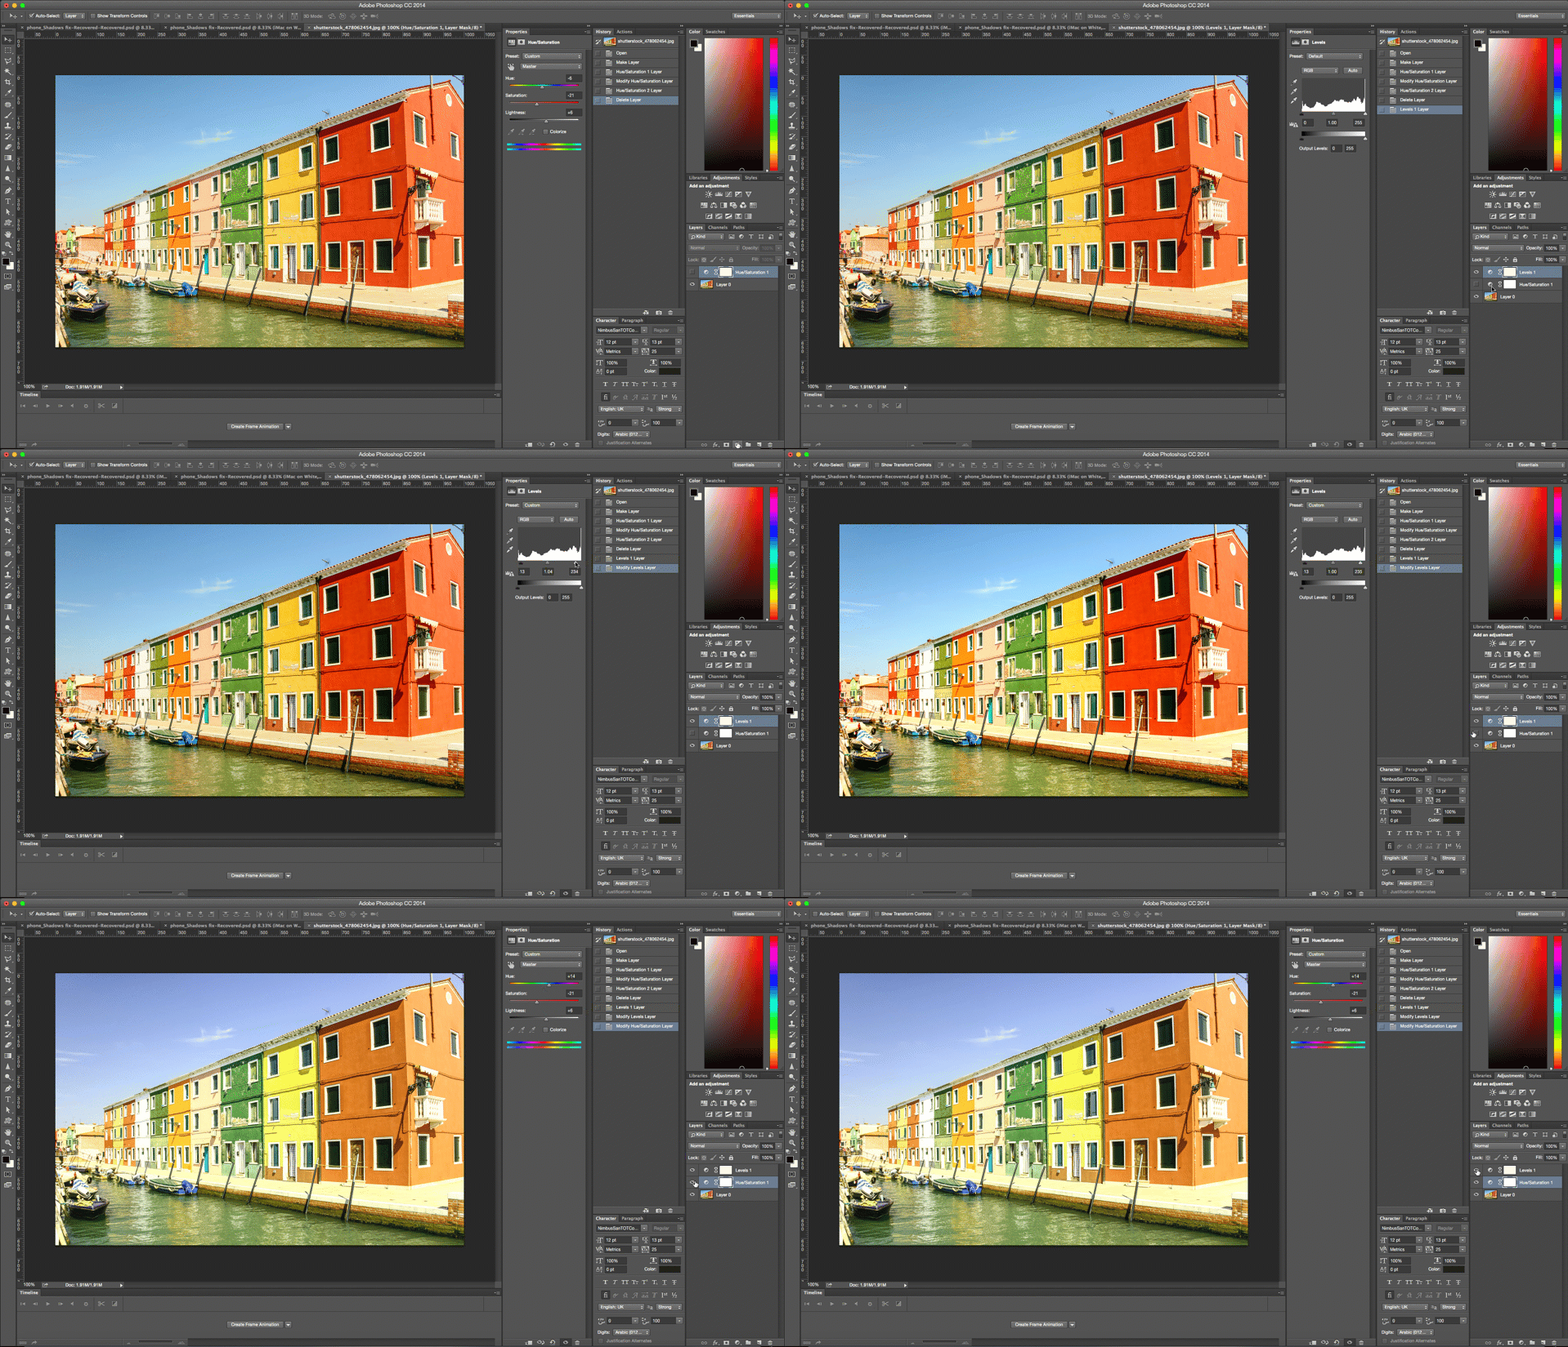
6. Adjustment Layers
A wonderful image has more to it than meets the eye. That is why the Adjustment Layers tool is important. Adjustment tool helps you to adjust the color and hue of your image by putting it on the top layer of the image. You can find this tool at the bottom of the Layer Panel in a black and white circle icon.
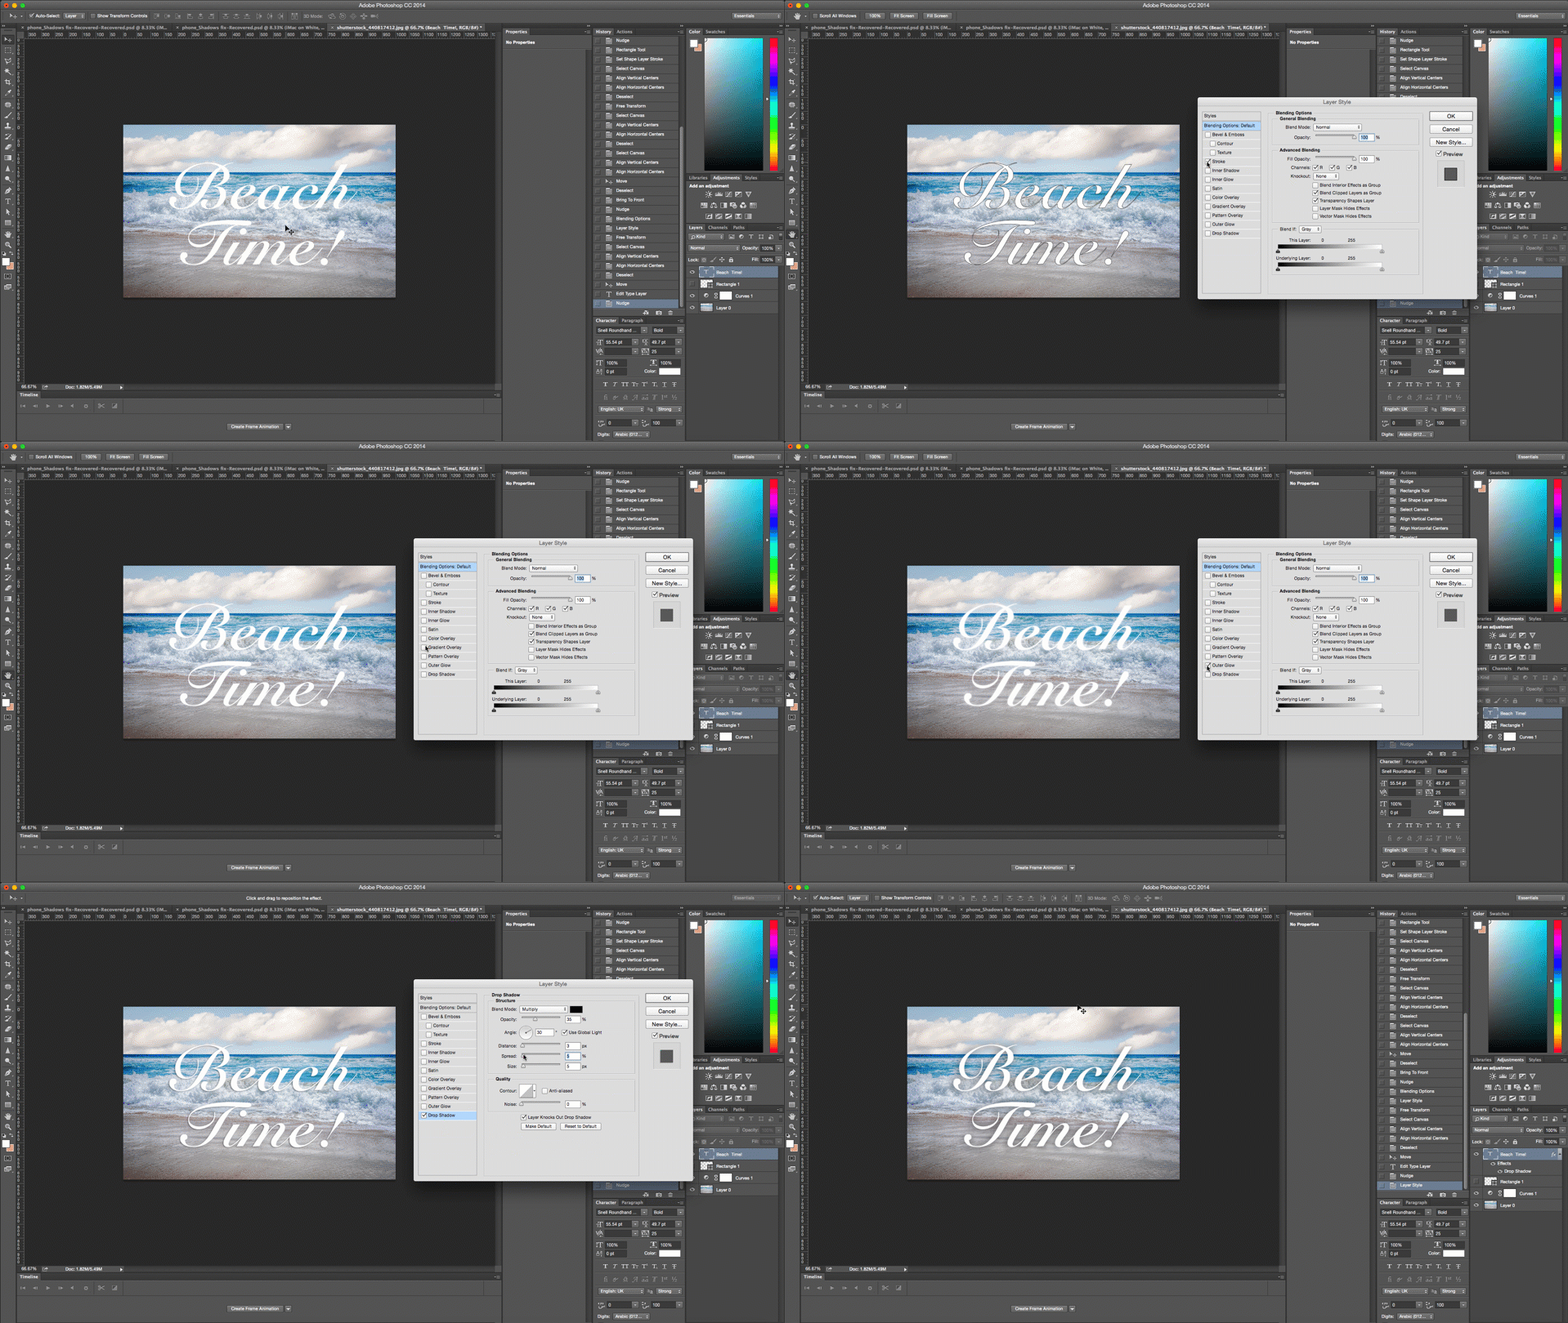
7. Layer Styles
If you want to add some special effects on your image, you can use Layer styles to add some effects quickly to individual images. Double click on a layer and choose the effect you want to put. You can use a variety of features, add a stroke or glow, drop a shadow and much more. Be careful, don't overdo it.
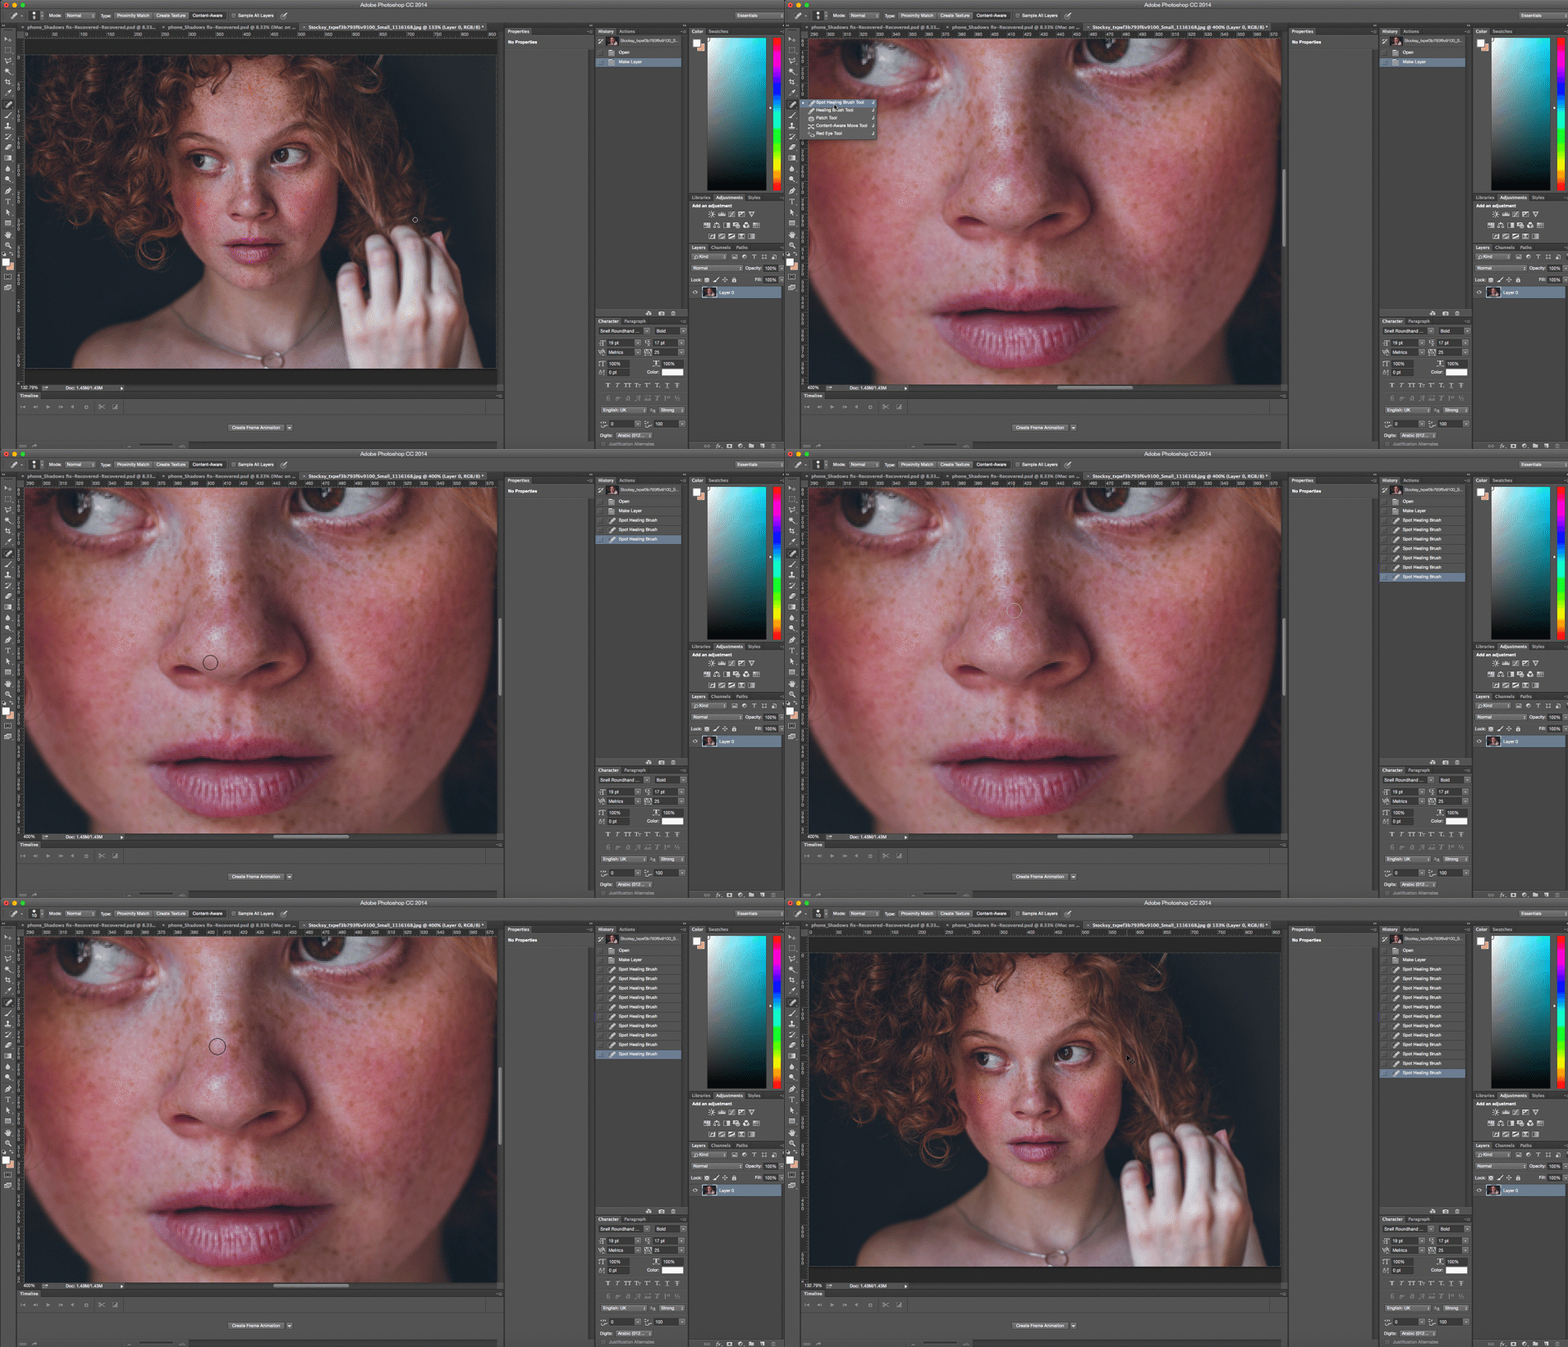
8. Spot Healing Brush
This tool is one of the favorite tools for teenagers as it helps to remove pimples, spot and remove all the little imperfections from your life. Just place the brush over the area you want to clean or fix, make sure that your brush is little bigger than the blemish and click. Taa Daa! Your pimples are gone! Photoshop automatically retouched the area to match your image to perfection.
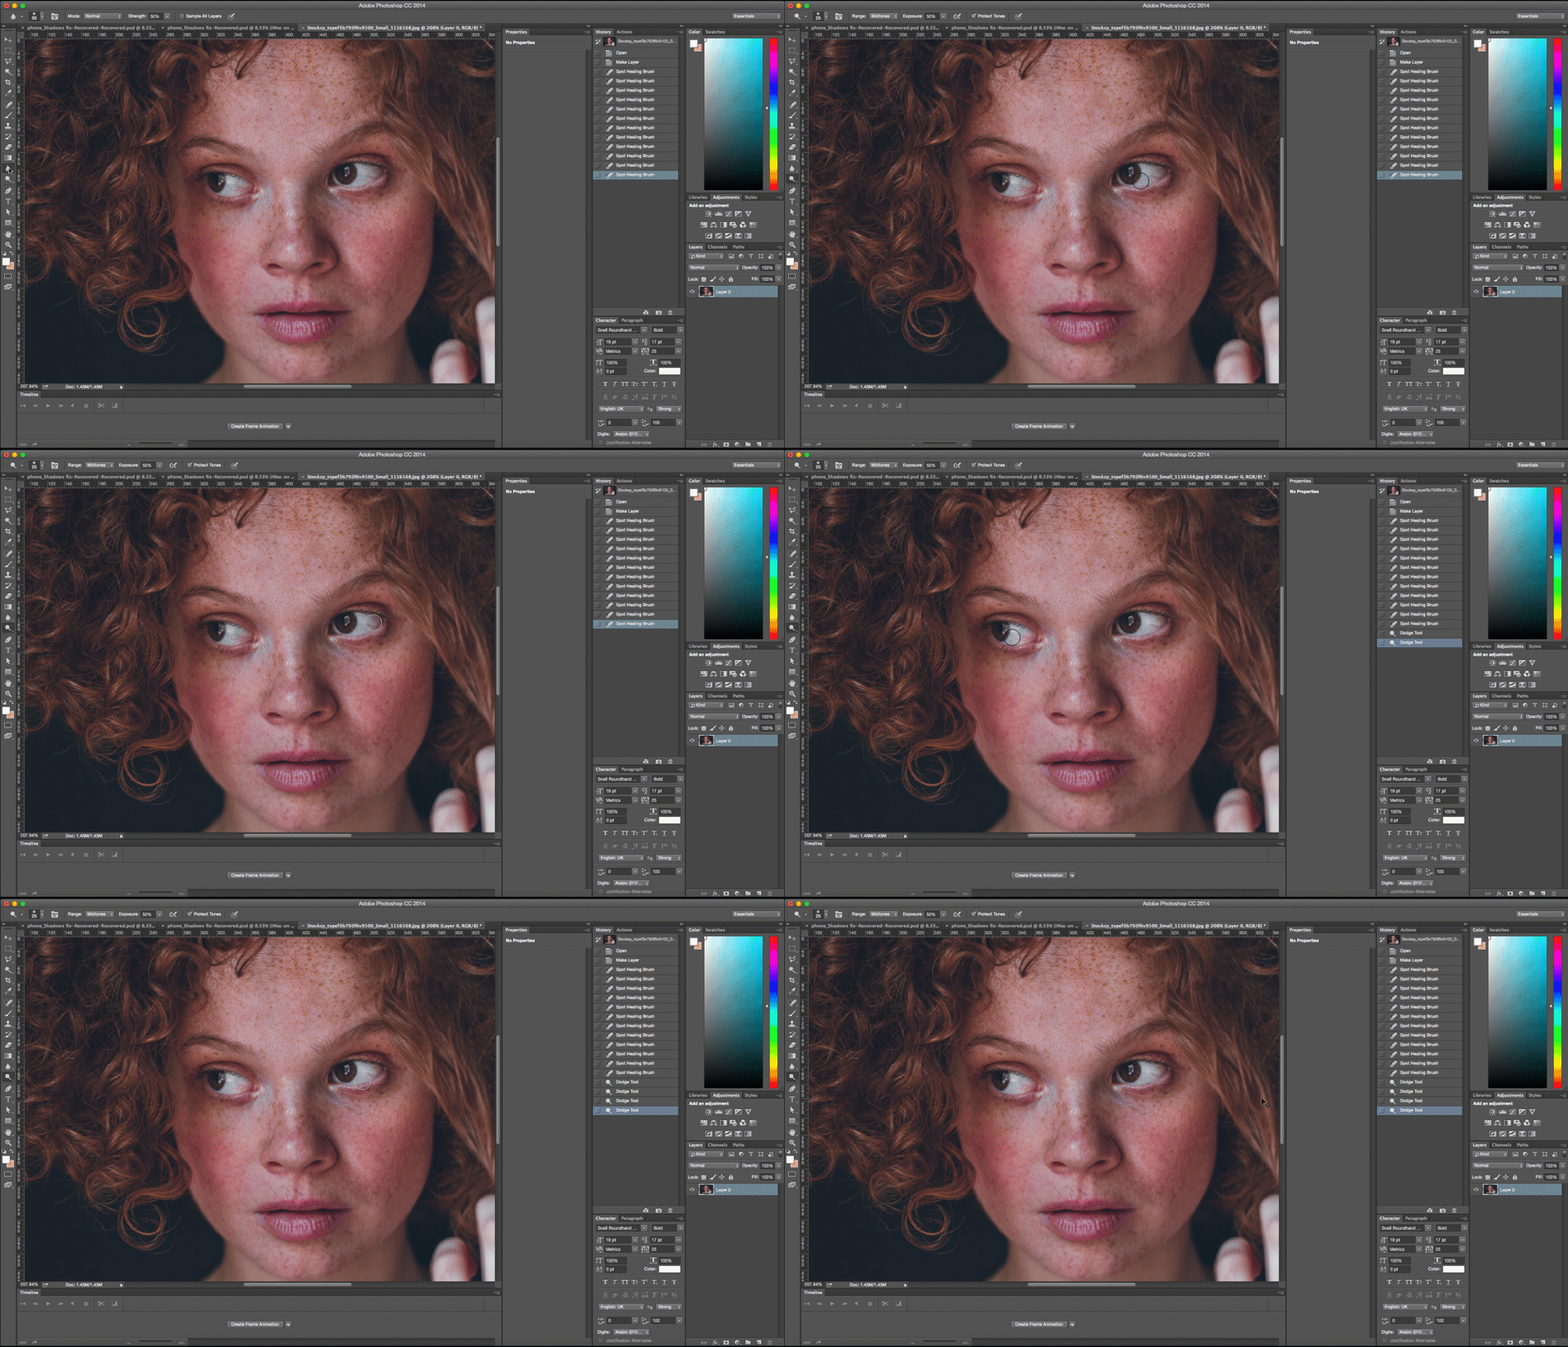
9. Dodge Tool
The Dodge Tool brighten up the pixels wherever you use it. Be gentle with this brush, don't over do it or your model will look like an alien.
10. Blur Tool
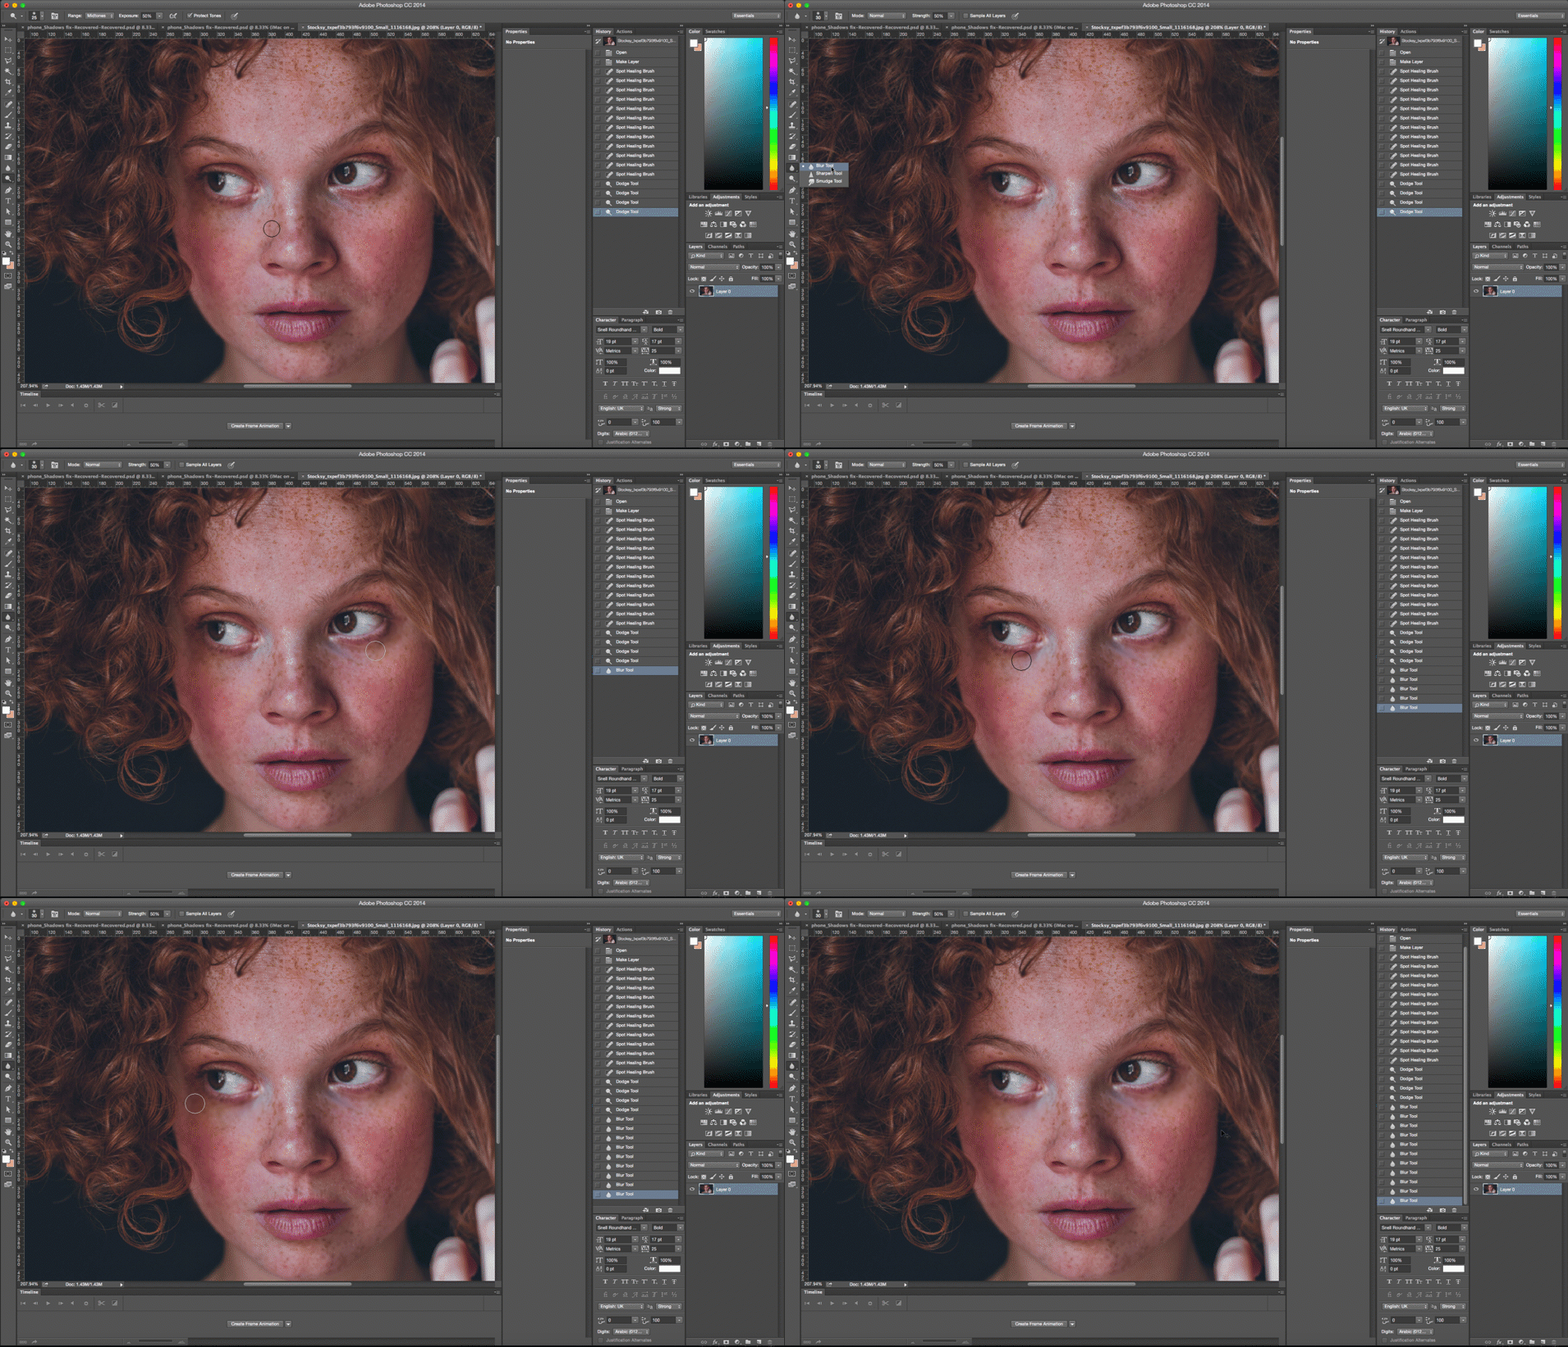
Use the blur tool to smooth-out small imperfections like the wrinkle under your eyes, neck, mouth, etc. You can use this tool to create depth of field, just blur out the background and your object will look like that it is in focus. Again, be gentle and don't overdo it or you might spoil instead of improving the image.
Note: All shortcuts in this article are for PC users. Mac people, you guys know what to do.
1. Transform: Changes Size, Rotation, Flip or Distort it
Click Edit > Transform > and select the action you want.
or you can try these shortcut to make it easier:
Press Ctrl + T on your keyboard and a hanger will appear around the image or text. Now you can resize or rotate your image like you want. The best way to do so is by holding the square corners of the hanger and then dragging the corner while holding the Shift key. And When you are done just press Enter.
And if you want to flip the image vertically or horizontally press Ctrl + T and then right click. A popup window will appear with few options, select the action you want to and press Enter to finish.
To Distort or skew press Ctrl + T and the place your cursor on whichever corner you want to skew. Press Ctrl while holding and dragging the corner to morph.
 |
| Credit: Nathaly Myers |
2. Unit of Measurement
A quick way to switch between the unit of measurements. Place your cursor on the rulers on your grid and right click, then choose a new unit for the menu. You will find a wide variety of units, from centimeters to pixels, millimeters, points and even percents. And you can show or hide the ruler by pressing Ctrl + R.
 |
| Credit: Nathaly Myers |
3. Magnetic Lasso
Lasso tool is man's best friend and gift to photo editing software. You can find this tool in your tool panel.
This selection tool will help you to trace the outline and cut, editing the exact part of an image.
To access the Magnetic Lasso, click and hold on the lasso tool until a drop menu appears. Magnetic Lasso is the Last one with a small magnet on it.
 |
| Credit: Nathaly Myers |
4. Magic Wand Tool
Magic Wand is another selection tool which works like magic. Just select the tool and click the area you want to select, but it only works on a consistent and monotone background like a solid color or clear blue sky. You can choose the Magic wand from the tool panel.
 |
| Credit: Nathaly Myers |
5. Custom Shape Tool
In the tool panel, we have all the basic shapes like circle, line, square, ellipse, etc. The Custom Shape tool is easy to find in the Options Bar, it looks a puzzle piece. You can access even more shapes by clicking on the small arrow right next to it. If you are looking for speech bubbles, arrows, banners this is just the tool for you.
 |
| Credit: Nathaly Myers |
6. Adjustment Layers
A wonderful image has more to it than meets the eye. That is why the Adjustment Layers tool is important. Adjustment tool helps you to adjust the color and hue of your image by putting it on the top layer of the image. You can find this tool at the bottom of the Layer Panel in a black and white circle icon.
 |
| Credit: Nathaly Myers |
7. Layer Styles
If you want to add some special effects on your image, you can use Layer styles to add some effects quickly to individual images. Double click on a layer and choose the effect you want to put. You can use a variety of features, add a stroke or glow, drop a shadow and much more. Be careful, don't overdo it.
 |
| Credit: Nathaly Myers |
8. Spot Healing Brush
This tool is one of the favorite tools for teenagers as it helps to remove pimples, spot and remove all the little imperfections from your life. Just place the brush over the area you want to clean or fix, make sure that your brush is little bigger than the blemish and click. Taa Daa! Your pimples are gone! Photoshop automatically retouched the area to match your image to perfection.
 |
| Credit: Nathaly Myers |
9. Dodge Tool
The Dodge Tool brighten up the pixels wherever you use it. Be gentle with this brush, don't over do it or your model will look like an alien.
 |
| Credit: Nathaly Myers |
10. Blur Tool
Use the blur tool to smooth-out small imperfections like the wrinkle under your eyes, neck, mouth, etc. You can use this tool to create depth of field, just blur out the background and your object will look like that it is in focus. Again, be gentle and don't overdo it or you might spoil instead of improving the image.
 |
| Credit: Nathaly Myers |
10 Photoshop Tips and Tricks for Beginners
![10 Photoshop Tips and Tricks for Beginners]() Reviewed by Bhavya Patel
on
January 11, 2019
Rating:
Reviewed by Bhavya Patel
on
January 11, 2019
Rating:

No comments